
WARNING - Please keep your eyes on the road at all times. Please don't navigate the computer while you are navigating the car.
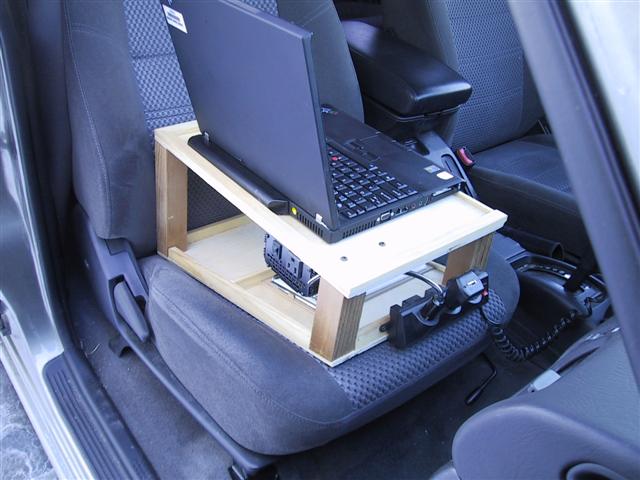
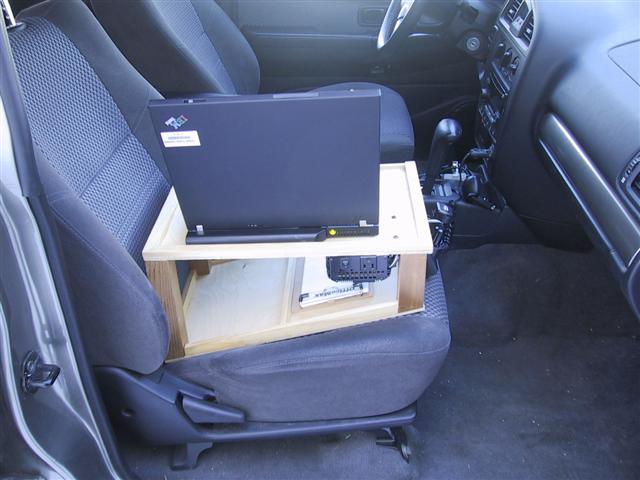
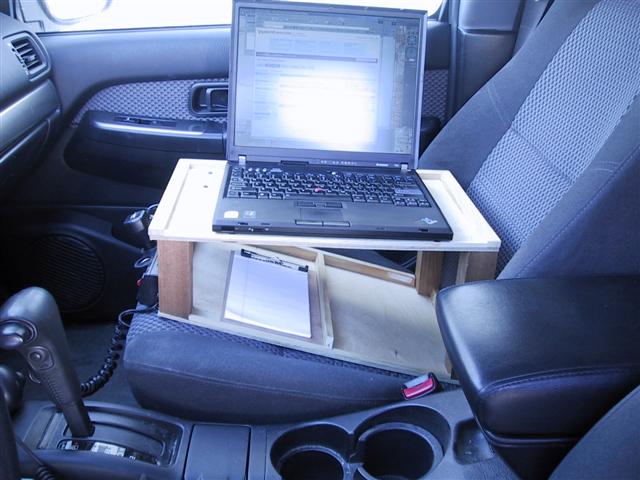
I built this simple laptop desk for the passenger's seat. It incorporates lighting, a 12Vdc power strip and a 110Vac inverter. The seatbelt goes through the desk to keep it stable. I can also be used without a laptop to provide two levels to hold motoring paraphenalia.
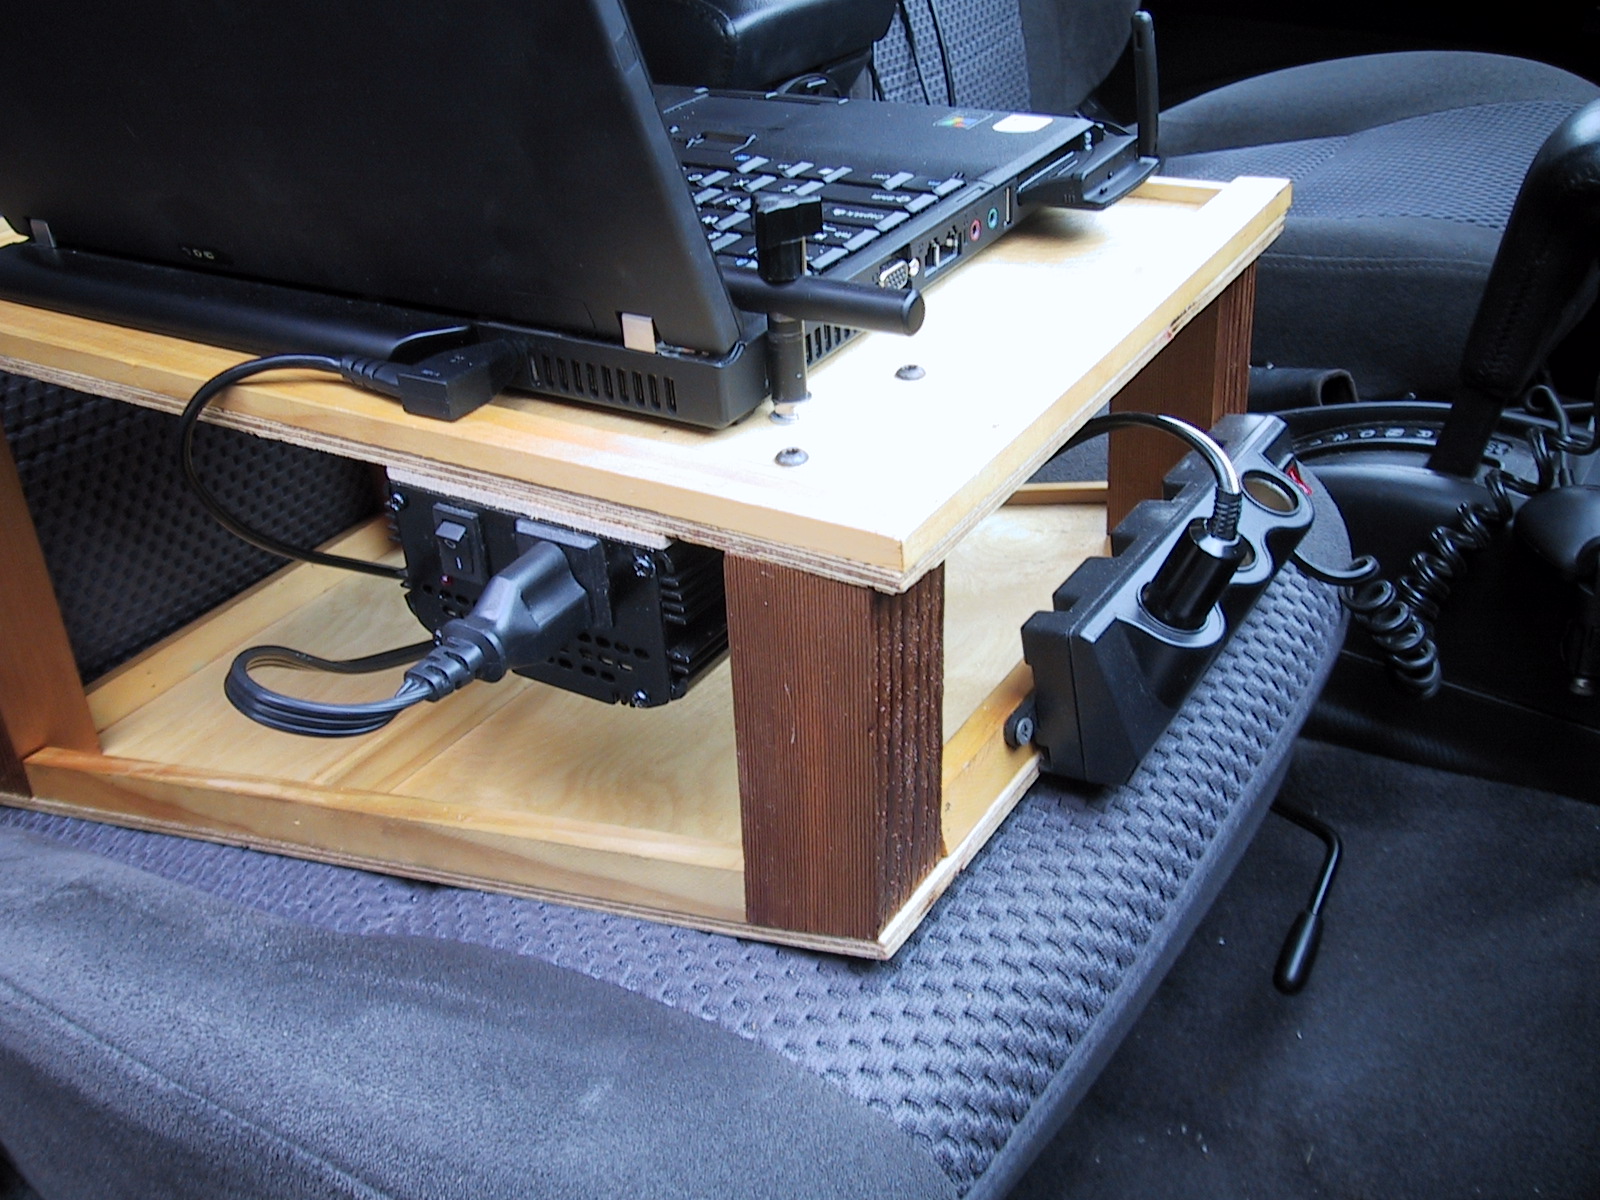
Construction - The top and bottom platforms are made of 1/4" luan (mahogany) plywood. This type of plywood is inexpensive, has more layers (stronger) and a smoother finish than standard 1/4" plywood. The corner posts are made of 2x2" lumber. I used cedar as it was lying around and has a nice dark look. To prevent items from rolling off the platforms, I placed 3/8" x 3/4" (approx) wood strips along the back edge and sides. Along the front edges of each platform are small 1/4"x1/4" wood strips which prevents things like pens and glasses from rolling off the top. The angle of the bottom platform needs to suit the automobile seat but 15° is about right. The finish is clear semi-gloss polyurethane.
Overall Dimensions;
- Top Tray Width: 11-1/2"
- Top Tray Depth: 18"
- Bottom Tray Width: 11-1/2"
- Bottom Tray Depth: 18-1/2"
- Height at front: 5-1/4"
- Height at rear: 9-1/2"
Power System - A small 110Vac 300W inverter was purchased and is mounted under the top platform. This is used to power the laptop's power supply. You should try to find the largest inverter that does not have an internal fan as the fan noise can be distracting while driving. However, the inverter needs to have enough power to handle your laptop (usually 70-90W - check the laptop's power supply labeling). A three outlet 12Vdc power strip is mounted along the front edge was found in the automotive section of a super store. It has a coiled cord to plug into the neaby cigarette lighter outlet, an on/off switch and mounting flanges. A 12Vdc map light can come in handy to light up the keyboard after dark. Note that many of the IBM Lenovo T series (T60 shown) has a built in light at the top of the display for just that purpose!
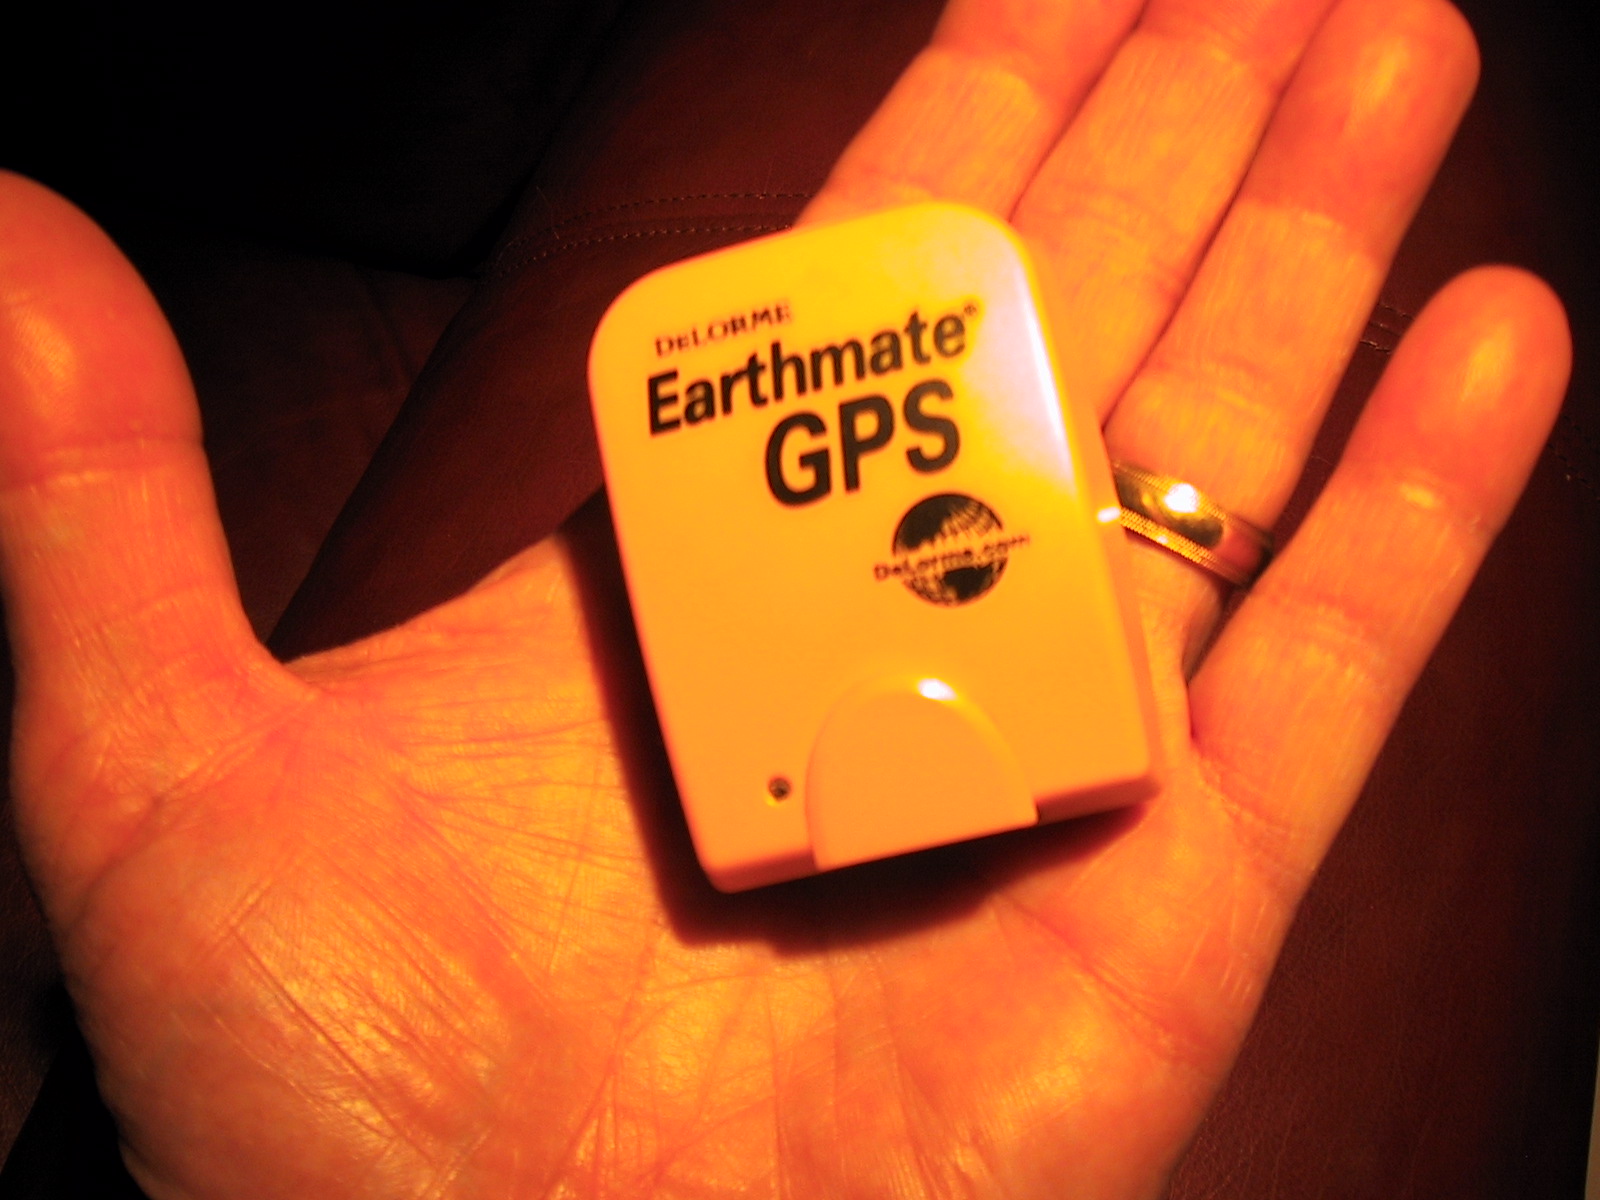
GPS Navigation - I once used my laptop as the heart of a GPS navigation system by using the Delorme Street Atlas software and Earthmate GPS. The software and GPS cost about $50-$100. The GPS (antenna and engine) is about the size of two matchbooks, mounts on your dashboard and uses USB for power and communications (see the picture below). While this is not as portable as a standalone GPS handheld devices like Garmin, Tom Tom, smartphone, etc, it is decidely less expensive (assumming that you have a laptop) and more powerful. The software has many features over the handhelds and, obviously, a much larger screen.
Internet Access - When I am on the road I want to bring the Internet along with me. Generally when I am at someone's home or a hotel, I can get a wired or a wireless ("Wi-Fi") Internet connection. However, what do you do when you are on the road? The cellular telphone companies have two solutions;
- Smartphones - Most models can become a wireless "Wi-Fi" hot spot. This requires activation and an additional fee. Then your laptop can connect to the Internet.
- Wireless Broadband - These offer connection speeds up to 1Mbps and beyond in many cities and along major highways (getting faster and more ubiquitous every day) with slower speeds and coverage in the hinterland. This requires an external device the typically plugs into a USB port.
Future Plans
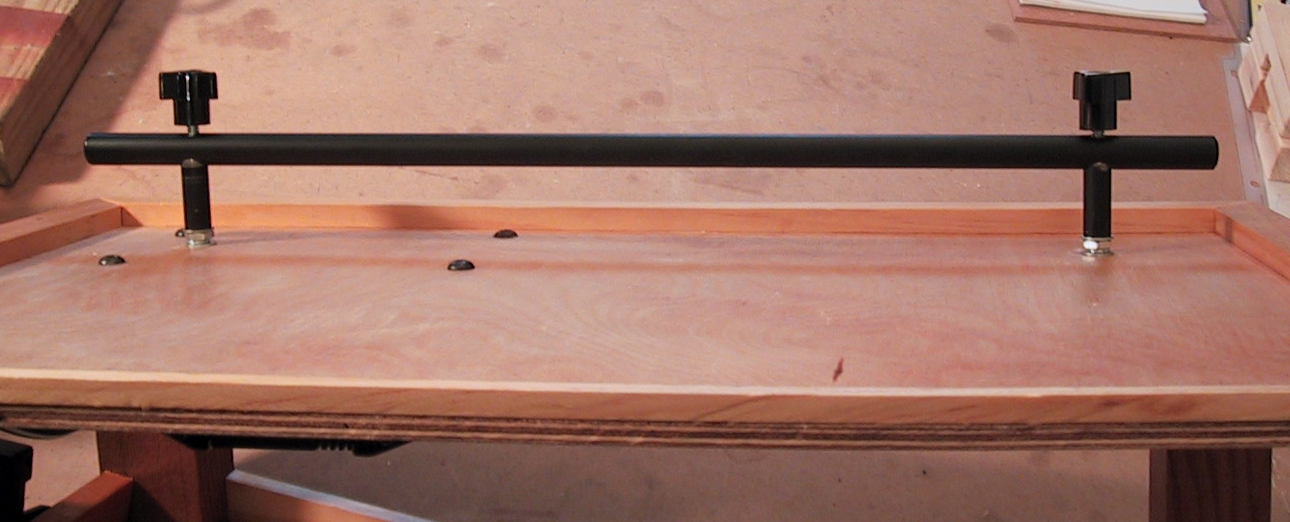
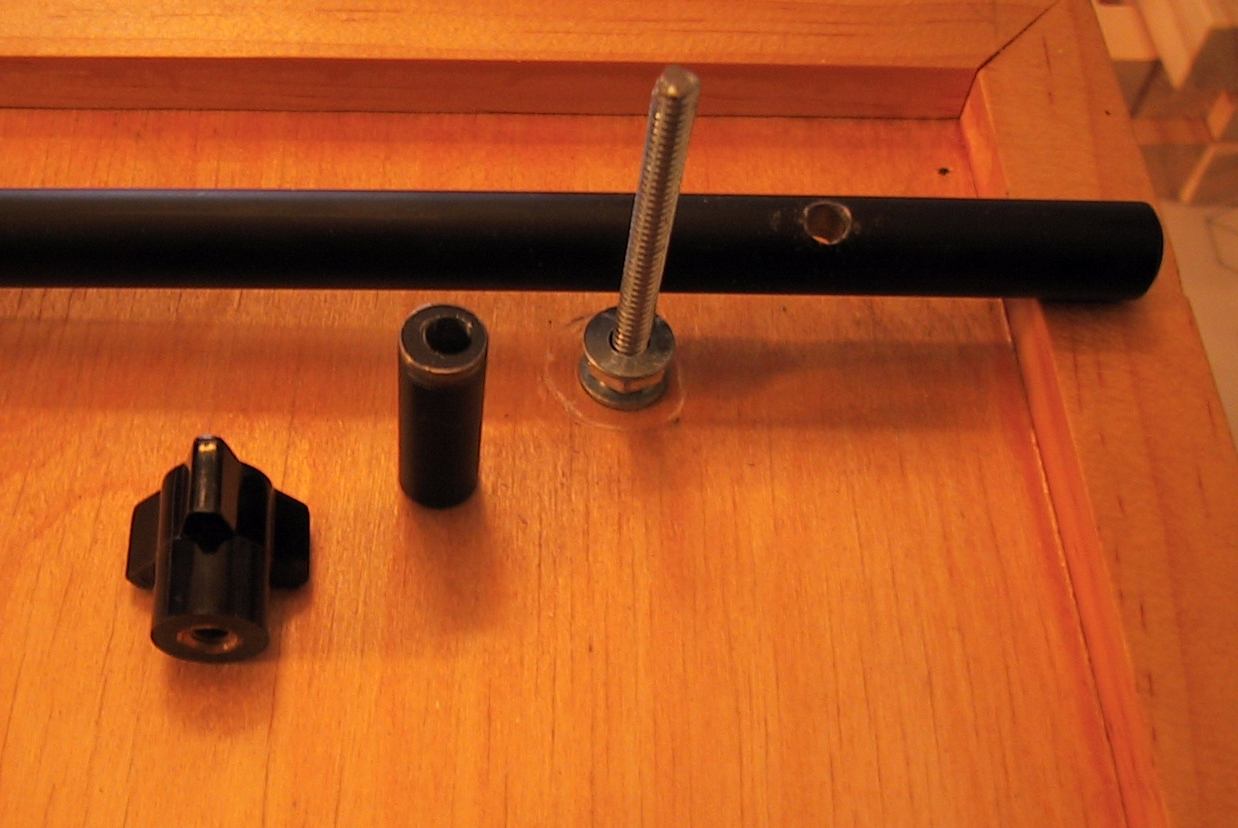
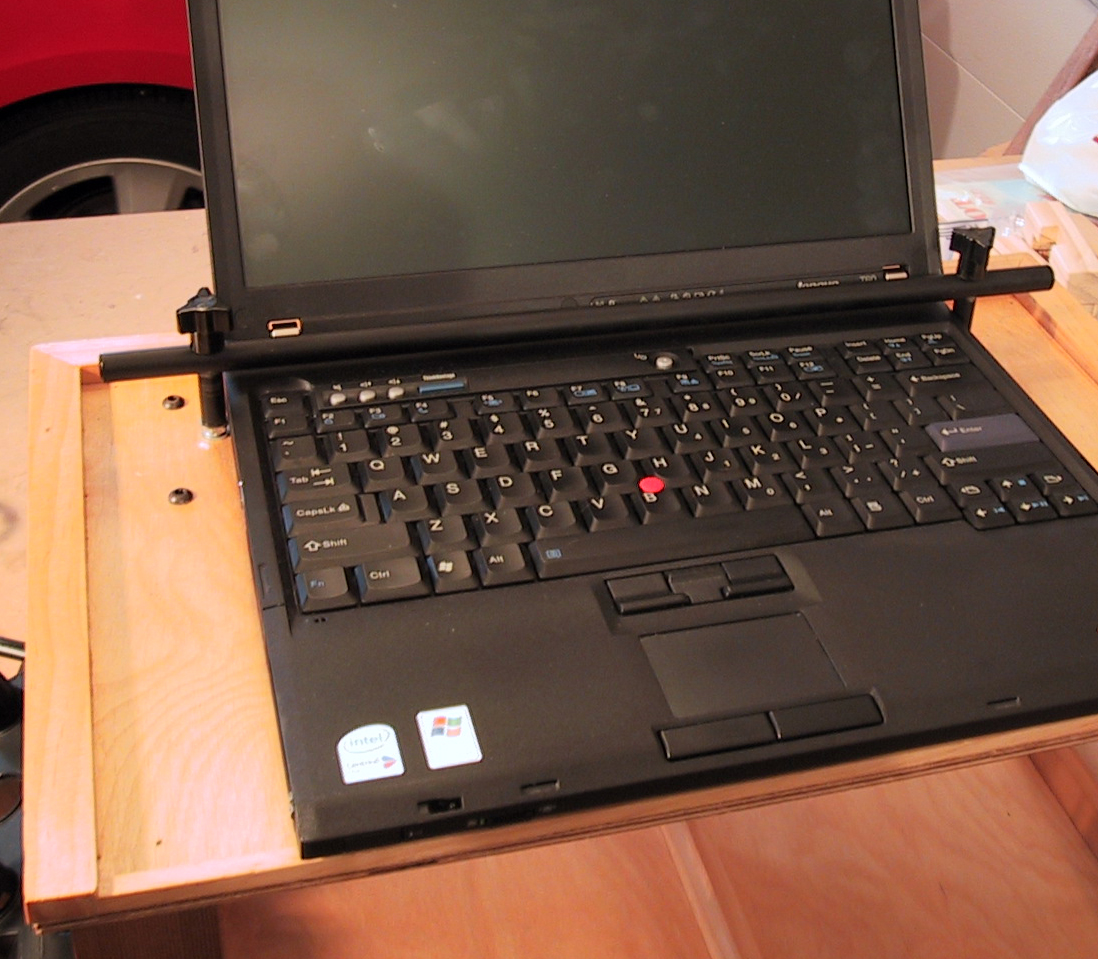
A bracket to hold the computer to the desk and still release easily.Completed!- Add a sliding tray under the top platform for a small clipboard.
- Something to hold pens, pencils, etc.
- A small 6"-9" touch screen VGA monitor for the dashboard. Cost is about $200-$300.
Send email to john@derosaweb.com with any questions or comments.
Click on the images below to enlarge